KPI Dashboard guide for RAS staff
The KPI Dashboard feature is designed to allow members to view significant business data and reports visually.
Accessing the KPI reports
There are different access for different roles to protect the security and privacy of the members’ data:- For members, only business owners can access KPI reports. Data for other businesses and average information are not accessible.
- BDS, Management, and RM roles will have access to KPI data for each member and national and state averages information.
For BDS, RMs and management
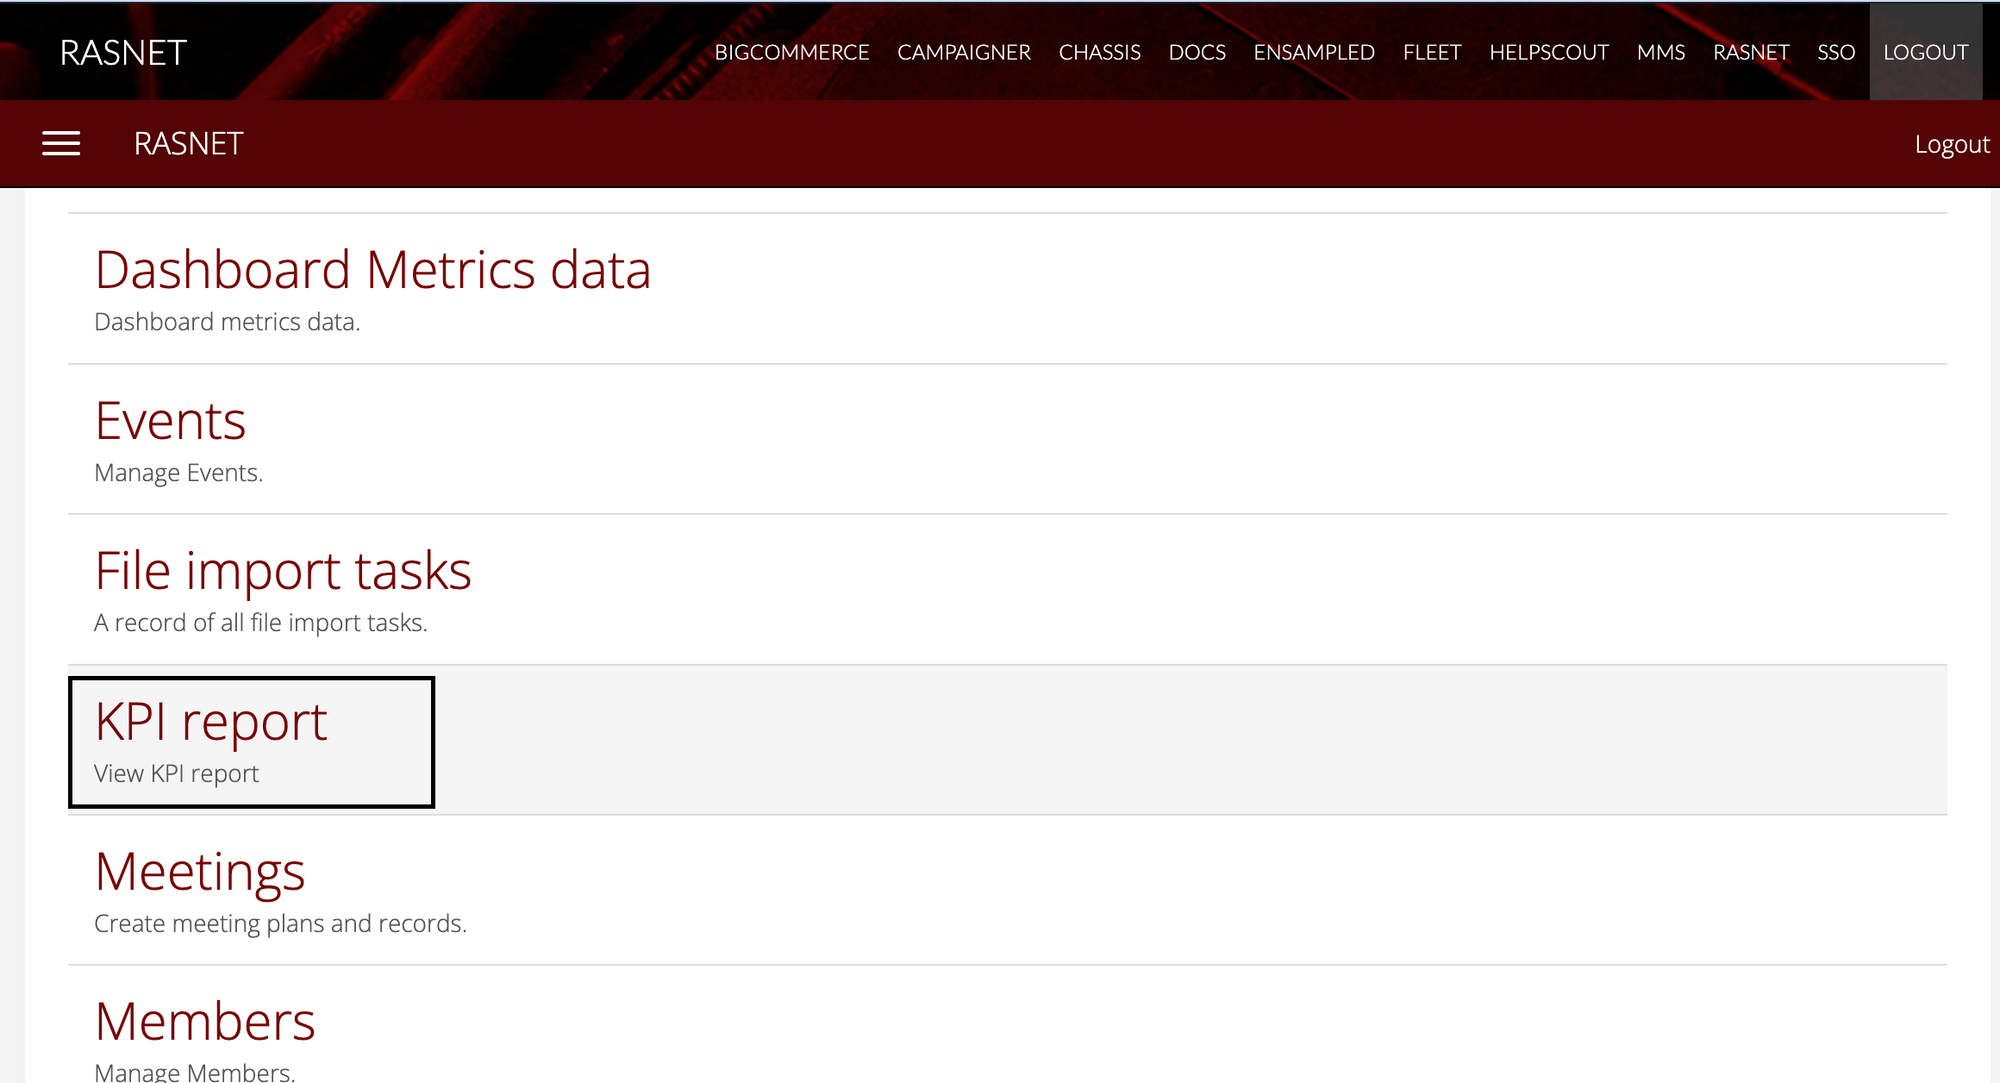
For all non-member roles to access the reports, they’ll need to:- Log in to RASNET portal via this link: https://rasnet.repcoservice.net/
- Click on the KPI report link.

For members
Before members can access the reports, they’ll need to:- Complete an owner verification process which involves:
- Sending a verification code to their mobile device.
- Entering the code into RASNET to verify they’re an owner of the business.
💡 The KPI dashboard feature will only be accessible to business owners. Members will need to contact BDS if their name does not appear on the list when they need to access the KPI reports.
- Agree to the terms and conditions
💡 If after agreeing to the terms and conditions, a member changes their mind regarding participating in the KPI reporting, they will have to contact their BDS to have their access removed.
Business owners
In order for the business owner to access the KPI reports, their information needs to be entered correctly into MMS, so that we can list the business owners to the user during the owner verification process. To ensure the business owners are up to date, follow this process using MMS:- Log in to MMS via this link: https://mms.repcoservice.net/
- Navigate to Members from the Models list.
- Filter to the member that you would like to update, and go into the detail page of this member.
- Click on the <Edit> button at the top of the page.
- Scroll down to the ‘Contact details’ section of the page.
- To check whether an existing staff member has access to the KPI dashboard:
- Click on the edit icon beside their name.
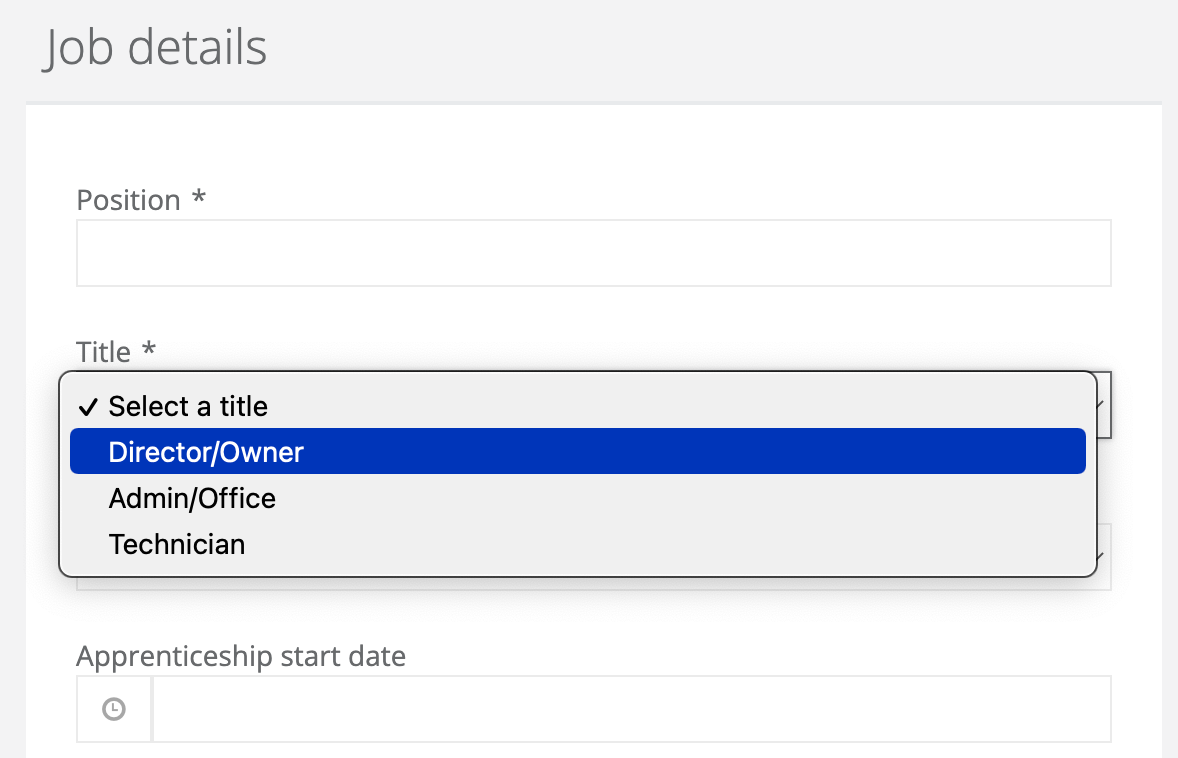
- On the pop-up modal, scroll down to the ‘Job details’ section.
- Check the ‘Title’ field that the value is ‘Director/Owner’ is selected.
- Make necessary updates and save the changes.
- If you need to create a new owner member:
- Click on the <Create> button above the staff member list.
- Enter all details for this staff member.
- For the ‘Title field under the ‘Job details’ section, select ‘Director/Owner’.
- Save this staff member.
Using the reports
From the KPI dashboard, the following types of reports are available:- Total Income
- Overall Workshop Productivity
- Net Profit
- Wages % of Total Income
- Cost of Goods Sold
- Non-billable Staff
- Operational Expenses
- Average rate for labour sold
Changing the reporting period
To view data for a different month, click on the month selection drop-down list in the top-right-hand corner of the report.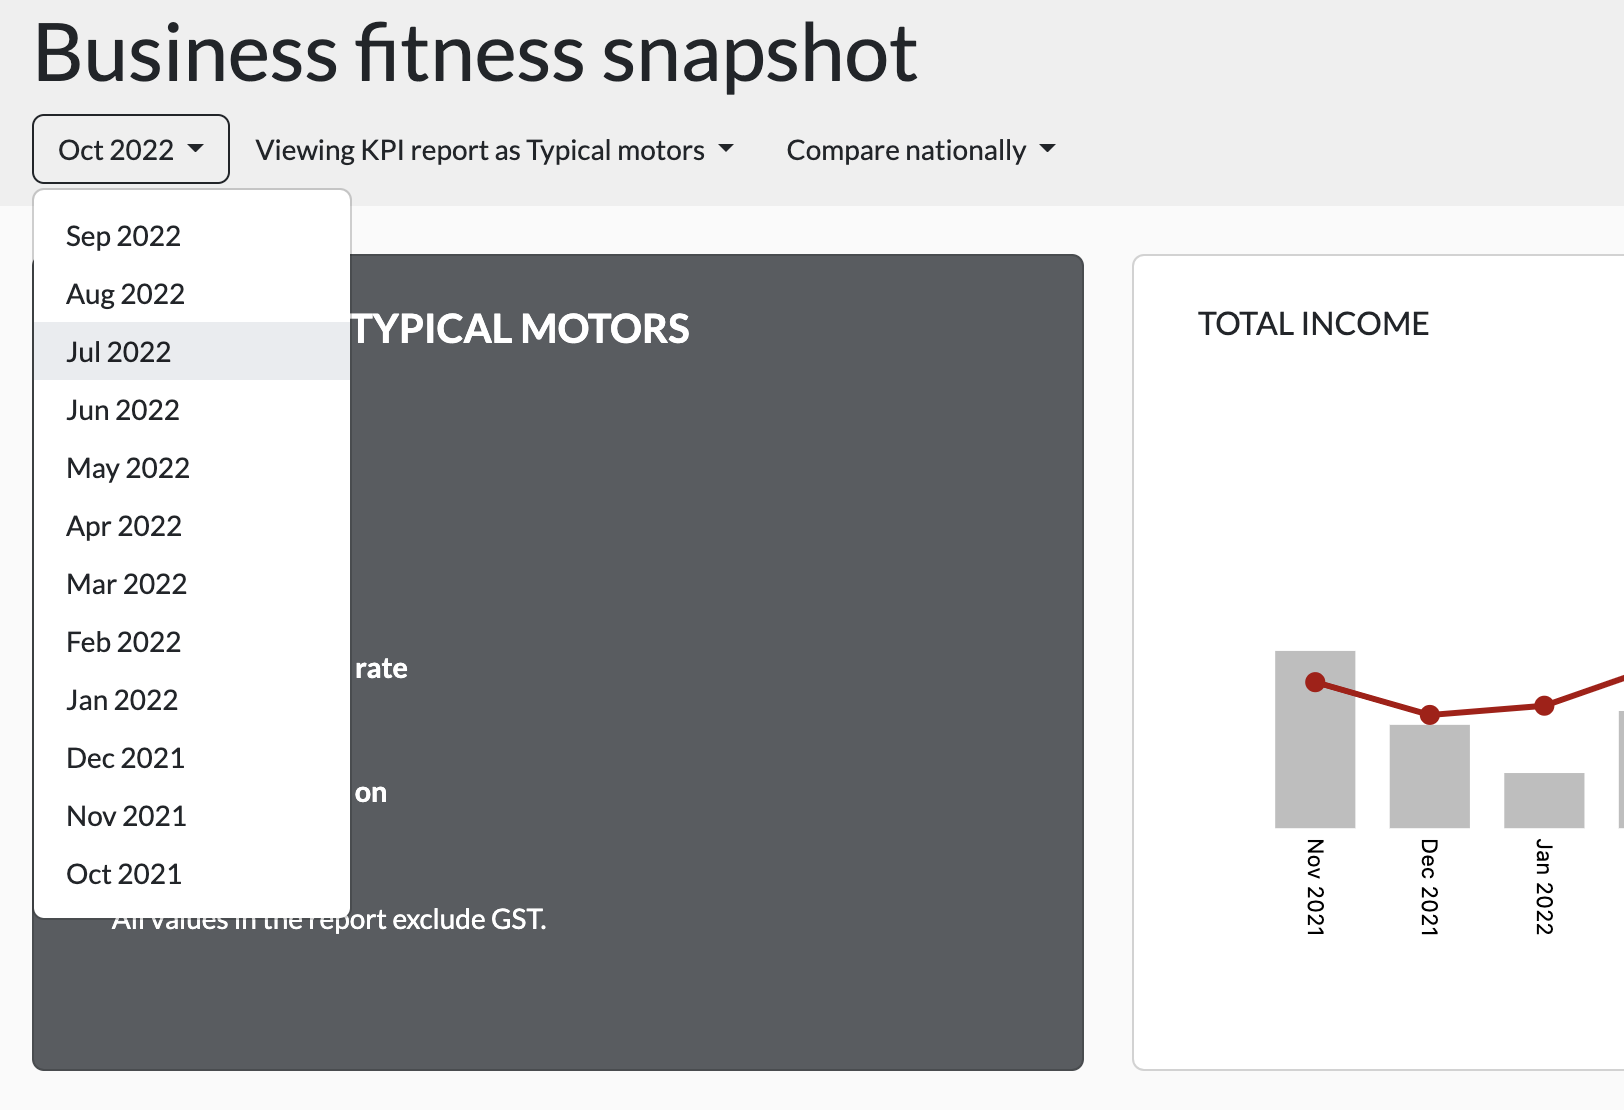
💡 The KPI reports on the dashboard will reflect data for the period selected. However, the TOTAL INCOME graph will display data from as much historical data as available, up until 12 months in the past.
Changing the member
You can switch to view reports for different members by using this filter located above the reports.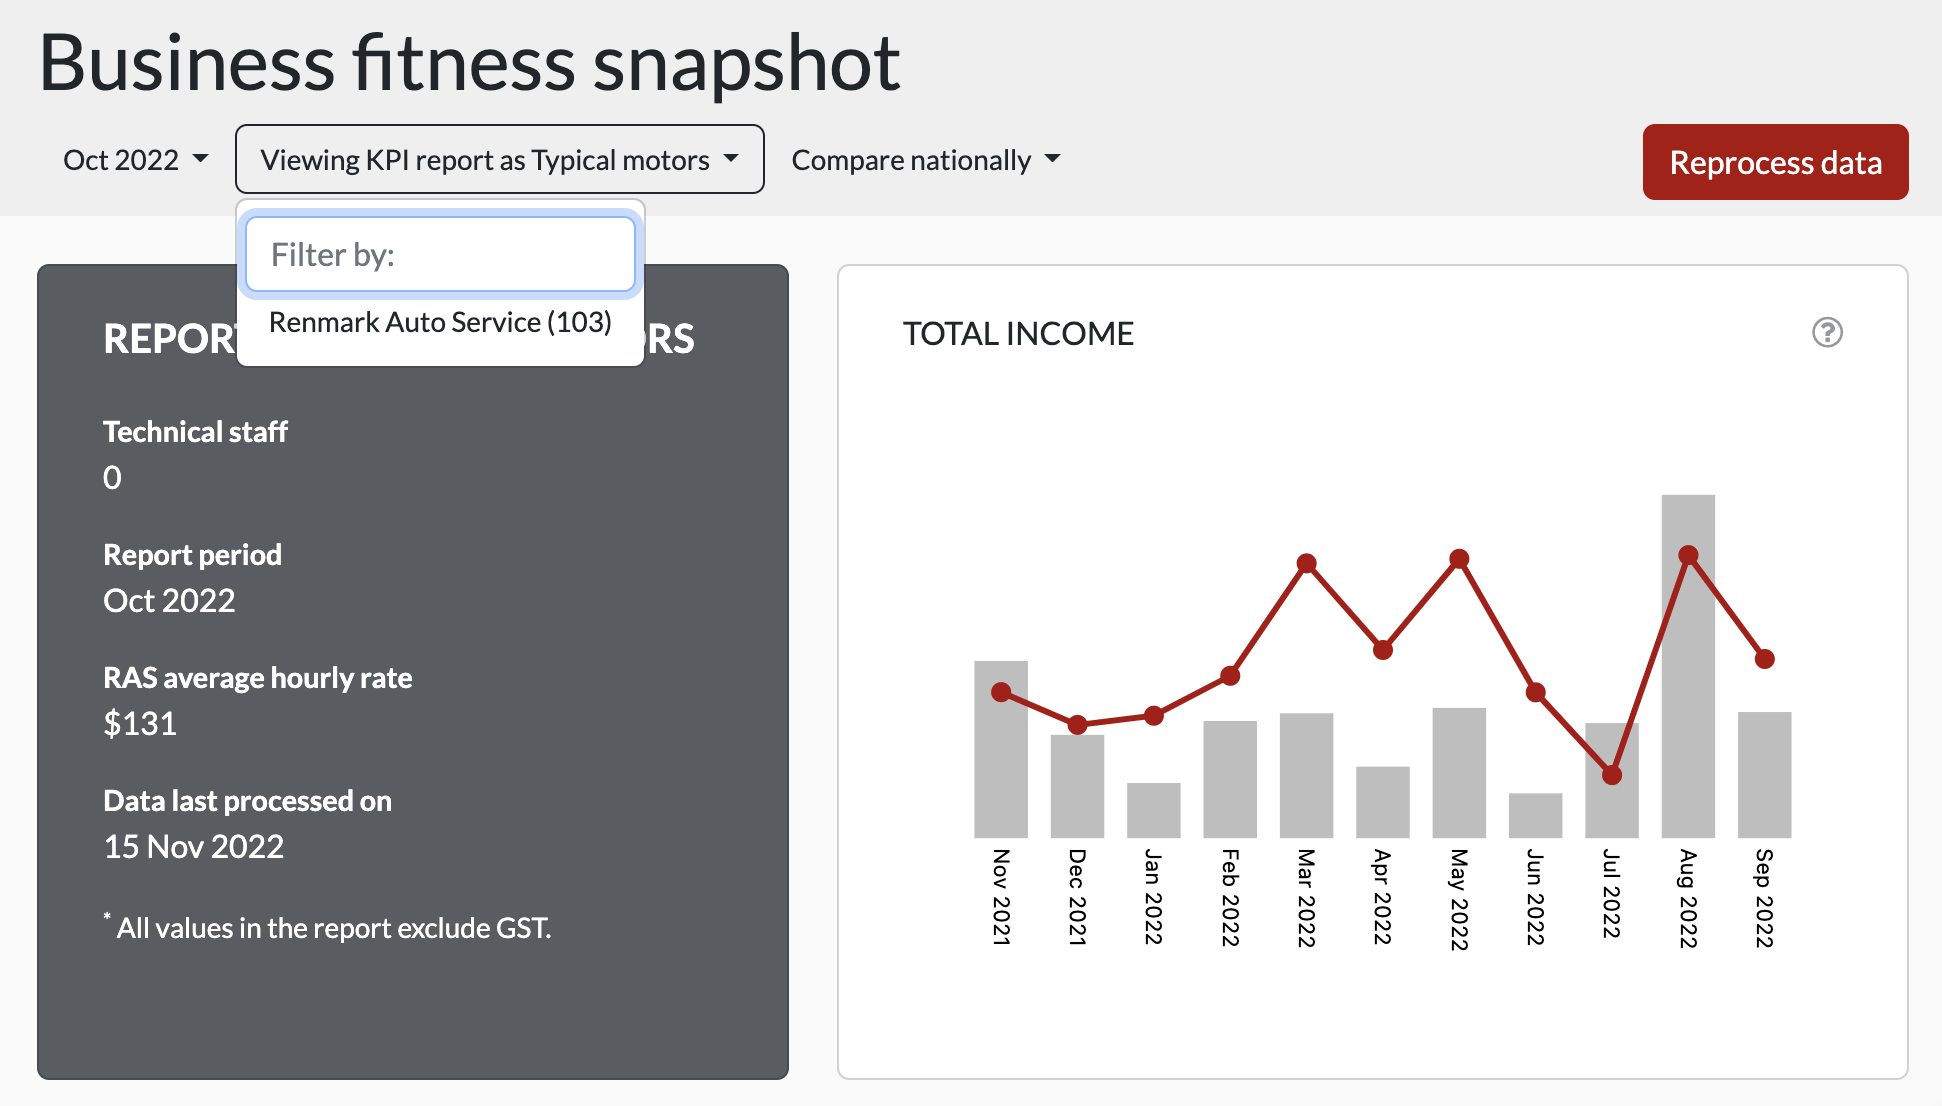
ℹ️ Only members who have signed up for the KPI report will be included in the *Viewing KPI report as* a drop-down list.
Reprocessing data
When reviewing reports and averages for members, if you find that data might not be up to date, you can click on the ‘Reprocess data’ button at the top right corner. This function will reprocess data up to the current date and re-generate reports. The process might take approximately 2 minutes to complete. You can check the attribute ‘Data last processed on’ from the left to confirm whether it is completed or not.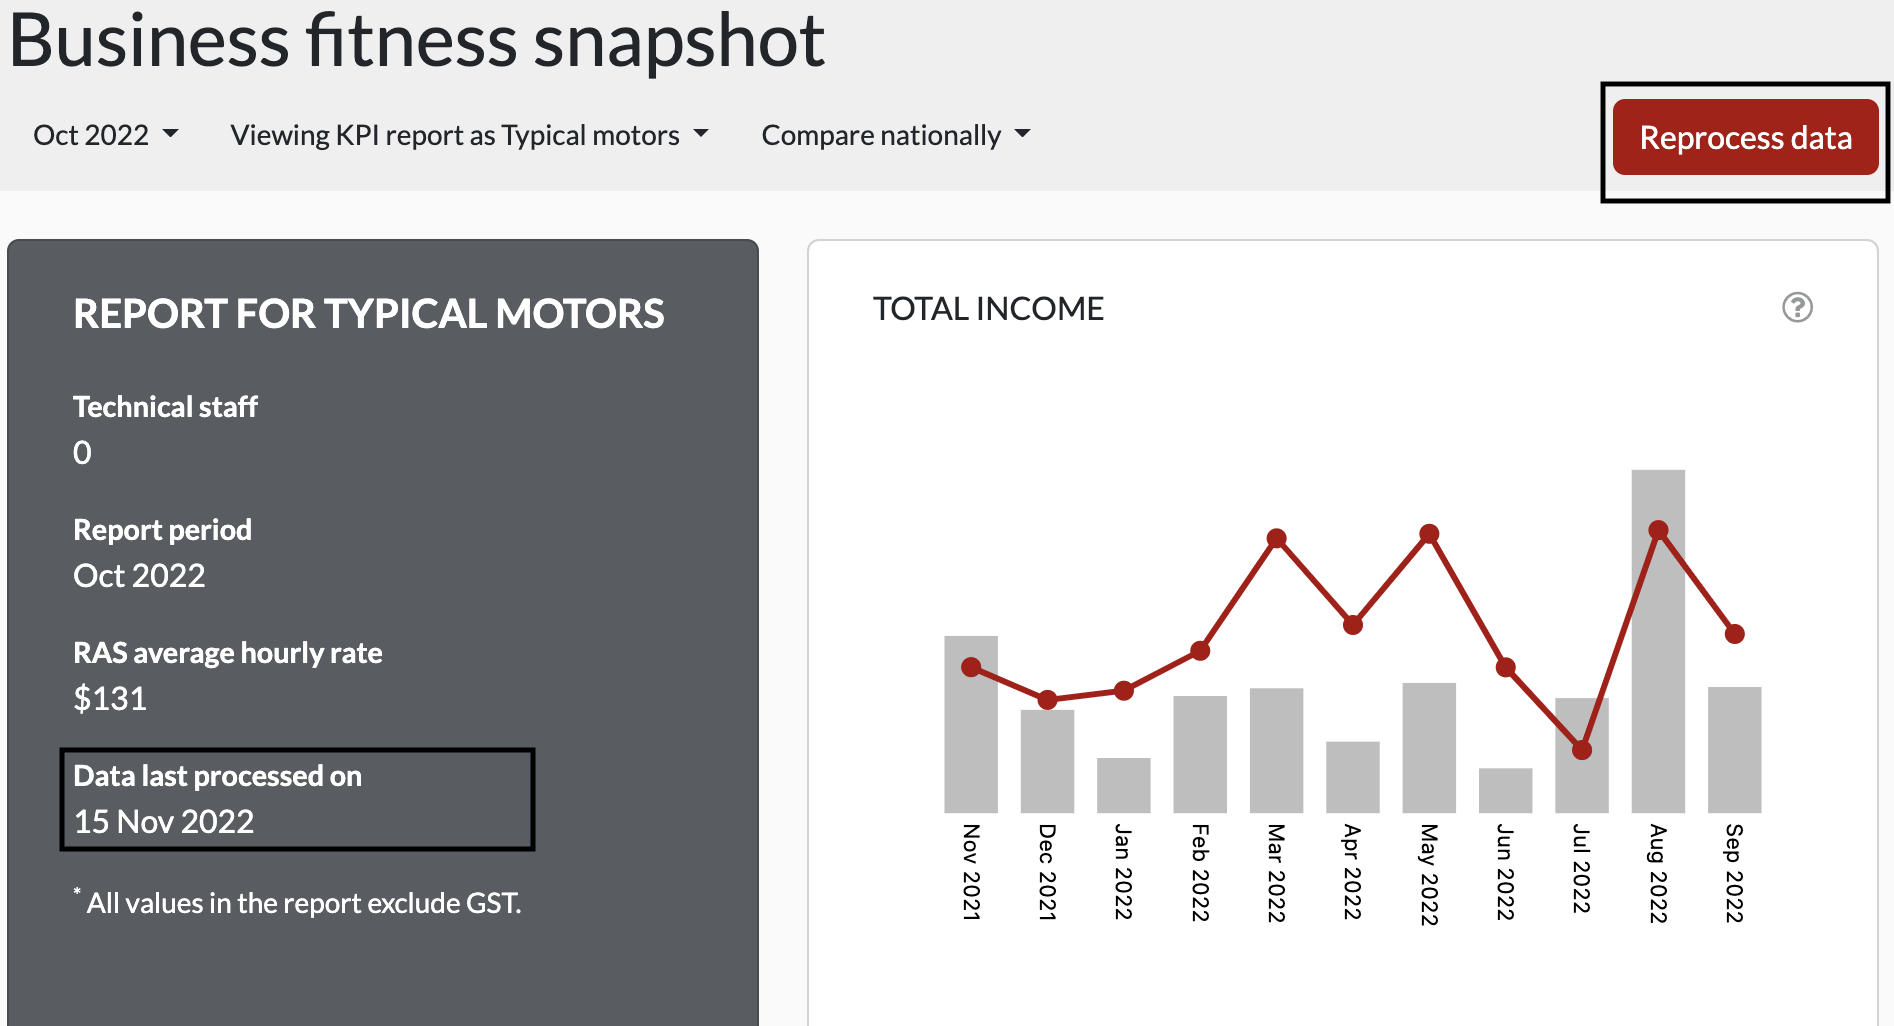
Reviewing Averages
Non-member users can directly compare a member's data to the averages of the members’ state or nationally. You can switch to view national or state average data by using this filter located above the reports.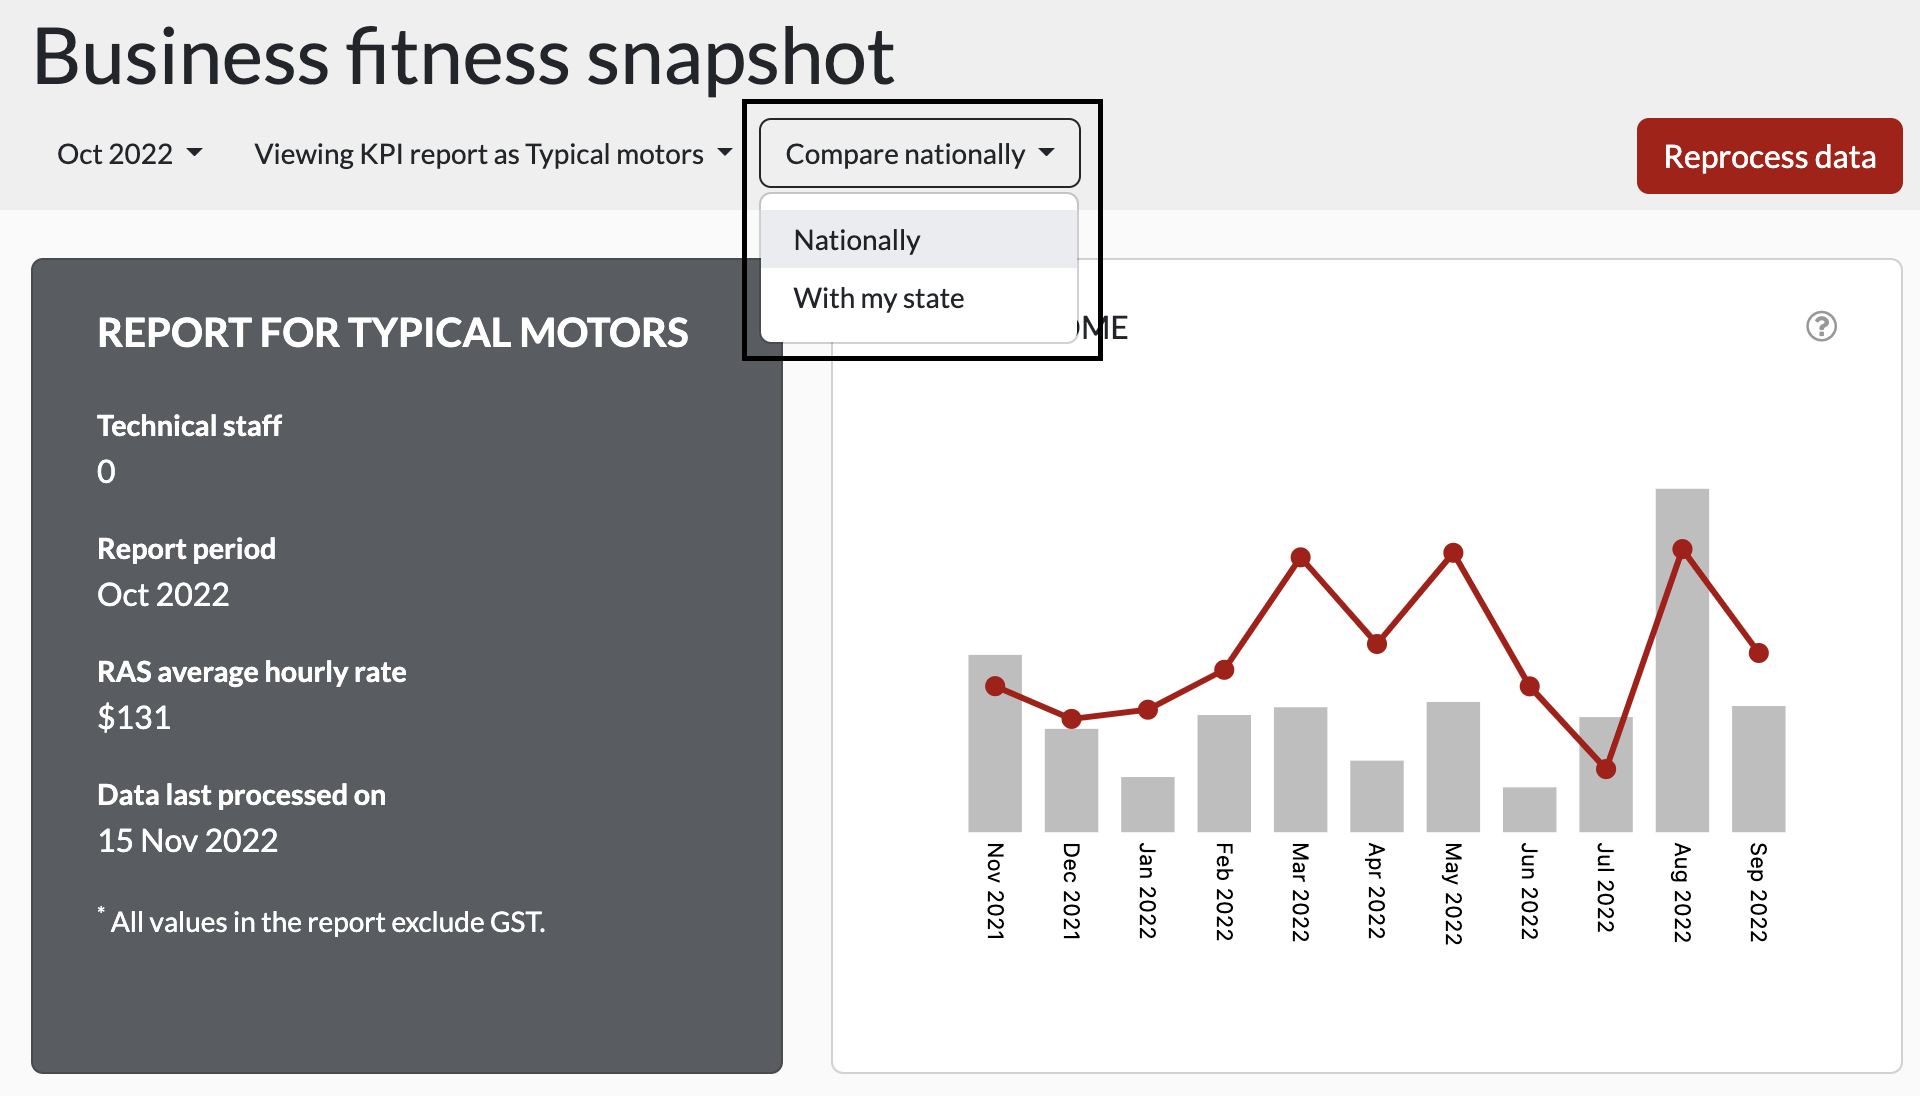
Reviewing graph explanations
Click on the `(?)` mark icon at the top right of each report to read more information about the report, such as how is the data calculated and how to interpret the results, etc.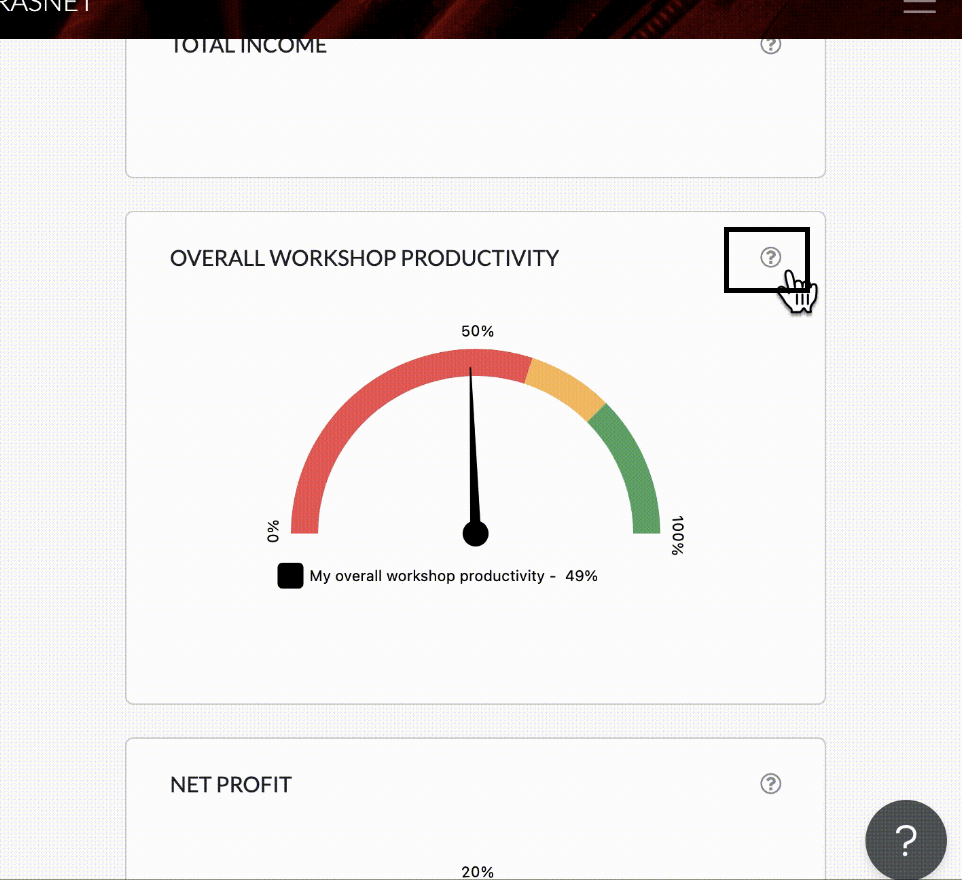
Data Collection
When a member first signs up and accepts the terms and conditions, data for the last 12 months will be collected to generate the reports. Data is then loaded according to the following schedule: Data for the previous month is collected and processed on the 15th day of the month. This allows time to ensure all accounts have been reconciled.💡 For example, on 15th June, reports for May will be generated and ready for review
Opt-out
If a member wants to opt-out of the KPI report, the action will need to be completed by a BDS or RM. Follow these steps to do so:
- Log into MMS at https://mms.repcoservice.net/
- Navigate to the Members model.
- Search for the member wishing to opt-out of the report.
- Edit the record.
- Navigate to the KPI report section and set the following options to No:
- Include in KPI report?
- Include in KPI report averages?
- Save the member's record.
Once these changes have been made, the members data will no longer be retrieved from Microbase. All existing data is also removed.
Opt-in
If the member would like to opt-in again at some point in the future, a BDS or RM will need to reverse the steps described above. At this point, the last 12 months of data will automatically be retrieved and worked into the dashboard (including updating averages for months that were retrieved).
The member does not need to accept the KPI terms again in order to access the KPI report again.